What's the best way to color it? Painting by numbers - tips, methods and tricks for coloring
Coloring books for adults are very popular these days. In the store you can find a book of any subject, for every taste, and spend the evening coloring incredible patterns or animals, creating your own unique world. It’s easy and simple; anyone who doesn’t know how to draw at all, but is passionate about it, can do this activity. How your picture turns out depends on your mood. You transfer your entire inner world: emotions, feelings and thoughts onto paper. There are no special rules here. By coloring pictures, your own or from a book, you heal your soul, help yourself cope with the experiences and stress that have accumulated during the day. But if you want to improve the whole picture, then we can give you some tips.

1. Focus your attention not only on color, but also on texture.
When it comes to coloring, think about all aspects of the page. “Some people like to color even the smallest details of a drawing,” says Millie Marotta, author of Animal Kingdom and Tropical Wonderland, “while others like to cover a large area of the drawing with one color and paint the details separately. But they all allow the lines to work through color - there will be color there, but underneath there will be texture...”
2. Try to work out the details.
When it comes to illustration, you don't have to have a color scheme in mind. But you can imagine how someone else would color this drawing and in what way this could be done. There is no need to think about uniqueness, if you take the same coloring book, then everyone will color it in their own way, some will even complement the drawing with their own details, and the finished works will be absolutely different from each other, even with the same basic drawing, they will all be be perceived as different. Think about details where you can add more variety with color. It is the details that make a drawing beautiful. Some area may combine several colors, but somewhere there will be no color at all, and perhaps the boundaries of the color will not coincide with the boundaries of the picture, inviting the imagination to go beyond the picture and dream up.
3. Add something of your own to the main drawing.
For example, Millie Marotta in her coloring books tries to offer different drawings. To the very detailed ones that occupy the entire page, she also adds less drawn ones with large empty spaces around the coloring pages precisely in order to stimulate the imagination, to encourage one to add their own details or texture to the drawing.
4. Pencil is the best solution!
A pencil is the most versatile item. With a pencil you can draw different textures, you can mix colors, from one green pencil, for example, you can take up to 20 different shades, which you cannot do with markers or pens, and they will not spread like paint, the pencil can be shaded, you can achieve different effects by placing the pencil at different angles, not to mention the fact that there is watercolor pencils, which are blurred by water and a watercolor effect is obtained.
5. Be careful with markers
Markers can be more of a hassle than a pleasure to use. If you decide to draw with markers, you must be careful. Markers can be filled with fairly “heavy ink” that can overlap the texture, bleed through the page and stain the next drawing, and can mix at the borders to form dirt. The drawing may turn out dark and not beautiful. It is better to use colored capillary pens after the drawing is completed to draw in details. this will make the drawing more pronounced and bright. If you only draw with markers or pens, then to begin with it is better to use one or two, maximum three colors.
6. Although... it depends how heavy your hand is.
The effect you can achieve using markers or pens really depends on the drawing techniques of different people. Some people have such a light touch that they have no problem using markers or pens. Others have a “heavier” hand and often the ink begins to “bleed” through the page or a shadow appears on the other side of the sheet. There are many examples of incredible pen paintings. It all depends on your desire and skill.
7. Choose an illustrator whose interests coincide with yours.
Nowadays you can find a variety of coloring books, divided by topic. Many authors present us with their illustrations for coloring. Some people gravitate toward drawing birds, some like flowers, and some like cars... For example, M. Marota studied wildlife and went to wild reserves to study it, so her illustrations are filled with nature and birds. Choose a topic that is close to you for creativity.
8. Choose “your” style.
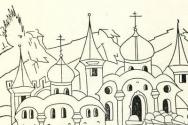
This point follows naturally from the previous one. Choose what is closest to you not only in topic, but also in style. Different authors present, for example, the same flowers in different ways. Each illustrator has his own style. You just have to choose what is closer to your heart - crooked fairy-tale houses or houses of a modern metropolis with strict lines, realistic animals or patterns, a contour that forms the image of an animal.
9. Because pictures in books are a reflection of the inner world.
This is not a case of adapting existing illustrations for coloring. Many artists create illustrations for coloring, they try to make the drawings different, different forms. So that you open a book with cats and find a dozen different cats for every taste and you don’t get bored and this interest remains until the end of the book. Therefore, flip through the book before purchasing, make sure that it is not the same cat from different angles (yes, there are such books), but many different drawings.
10. You can take your favorite animal for coloring.
It is no coincidence that psychologists say that people often resemble one or another animal and, depending on this, can make psychological picture. There are many tests involving animals. So why not call them to help you. The image of your favorite animal can stimulate your imagination and create a completely unusual picture, which you can even hang in a frame and it will continue to inspire you.
11. Do not try to use professional materials (pens, pencils, paints).
You can often find on the first page a set of tools that you may need for work. Don't pay too much attention to it. Improvise, try something different and, quite possibly, the result will be much better! It is important to find the “right” brand. You can take a very expensive pencil and it will draw poorly, because it is too hard or the pigment it contains will not stick to this particular paper, but you can take the most inexpensive one and get a wonderful drawing! Choose pencils and other tools according to how comfortable it is for you to work with them, and not according to their purpose and price.
12. Don't be afraid to mix materials.
Mixing different materials has an incredible effect. People using watercolor can add a thin wash of watercolor or pastel to even out the background color. They can fill in the details with pens or pencils once the drawing is finished.
You don't have to stick to just one material. You can create a piece that is completed using a mixture of materials.
13. If you're feeling down, it can limit your color scheme.
Many people choose colors from a certain color palette, and only works with them. They could give themselves a theme. For example, use only autumn colors or summer colors. I think such preferences limit the possibilities. Some people simply choose a calming, harmonious color, or only warm colors or only cool colors.
14. You can consciously limit yourself.
You can create a very effective image by using a monochrome palette and painting the image with one color. You can find beautiful paintings made using 20 or 30 shades of one color, for example, blue. Thus, drawing in one color does not mean using one pencil. It can be three or four pencils, with which you can create a truly spectacular image.
15. Draw with friends.
In terms of inspiration, it would be great to share work through social networks with other people. Because you don’t just exchange photos, but also tips on drawing techniques, ideas, find new tools to implement your ideas, discover new brands of pencils or pens, learn about other books on your topic, etc.
16. Go towards your goal step by step.
You don't have to worry about whether you're doing everything right or not. It's just a game. You are simply drawing, it is an activity that should bring you joy and relieve stress and anxiety. You don't have to worry.
If you're thinking, “Oh, there's a huge empty space here, what do I need to fill it?…. I only have this thin one small pencil…..”, then stop, try to throw away these thoughts, just draw, don’t think about the result, don’t make a drawing plan.
17. Enjoy!
Play with the design, choose colors, don’t be afraid to ruin it. Even if it turns out not what you wanted, this is experience, your experience, which will tell you how to do better next time. Just enjoy the process. And don't forget that different people have different perceptions. You won't think the result is good, but someone may be delighted with it.

 2. Try to work out the details.
  3. Add something of your own to the main drawing.
  4. Pencil is the best solution!
  5. Be careful with markers
  5. Be careful with markers 6. Although... it depends how heavy your hand is.
  7. Choose an illustrator whose interests coincide with yours.
  8. Choose “your” style 8. Choose “your” style 9. Because the pictures in books are a reflection of the inner world.
  10. You can take your favorite animal for coloring.
  11. Do not try to use professional materials (pens, pencils, paints).
  12. Don't be afraid to mix materials.
13. If you're feeling down, it can limit your color scheme. 14. You can consciously limit yourself 14. You can consciously limit yourself 15. Draw with friends.
16. Go towards your goal step by step
17 Enjoy!
based on materials
Ailbhe Malone
BuzzFeed Staff, UK
unexpectedly, but since there are many techniques, I decided to write with examples.

(all pictures are not mine)
What is not suitable is wax crayons in general, thick felt-tip pens (from 1.5 mm tip), thick watercolor pencils, unless you know how to use them in watercolor mode and do not plan to paint small details.
what is needed: 

1. different felt-tip markers
With a super-thin tip (0.3 mm or less), it is impossible to paint over large volumes - they are best used for small contours or finishing touches. medium size (0.4-0.8) is possible, but you need to carefully monitor the layers and that they do not overlap each other - with felt-tip pens this does not always look neat. I categorically do not recommend felt-tip pens to those who love precision and accuracy in applying color. In principle, you can draw with a felt-tip pen on a felt-tip pen, but only darker ones on lighter ones. Thin light liners get dirty the same way. about brands: people complain that sharpie creeps and spreads even after application, but this greatly depends on the paper.
with a brush tip (watercolor). 
watercolor brush pen
The trick with pencils is that you don’t have to press as hard as you did in childhood. It is better to cover in several layers. Well, light shading gives you a lot of maneuvers - you can do graduations and mix colors as you like. You just need to remember about the direction of the strokes - it’s better not to change them within one place object. you can make a layer in one direction, and on top of the other at an angle to it. if you draw in zigzags, it may not turn out very neatly.


These two, of course, were painted by a pro... 

those for whom it is important to be able to play everything back should color using erasable pencils. I'm talking about them
There is also a convenient version - double-sided pencils, with different colors. this saves space, and still the long ones almost never end unless you draw professionally. but just short ones if you buy them (Crayola has them), it’s inconvenient for an adult to hold
colleen colored pencil
3. watercolor colored pencils. usually expensive. but you can get the advantages of both pencils and watercolors at the same time 

4. watercolor - the paper for coloring books should be quite thick. near the world-famous "enchanted forest" - just quite suitable 

5. multi-color pencils are those pencils where the lead is not one color, but from a pack of different pigments. There are versions in shades, there are completely mixed ones - rainbow ones

6. gel pens. best professional with a large selection of colors. minus - they run out quickly.
bright night gel pen


you can also take gel pens with different effects - metallic, glitter, etc.
in this set they also come in different thicknesses. but not cheap, professional quality%(
Sakura 57360 64-Piece Gelly Roll Artist"s Gift Set 

about technology
I strongly recommend that before you start coloring the page, you test new felt-tip pens/markers/pencils somewhere separately. check that nothing is leaking, even if you accidentally make 2-3-4 layers. This is especially critical for perfectionists. Experienced fighters generally recommend placing a sheet of paper between the pages to be sure.
You don't have to stick to the contours. you can color by ignoring them and creating your own color waves. 

or vice versa, smaller entities inside existing drawn objects - textures, new patterns, etc. 


and you can do without different colors altogether 

don't forget about the background. you can leave it white, or you can make it dark, multi-colored, or add texture too 

It is not necessary to follow any rules in colors. You can even choose an object to color and choose a random color with your eyes closed. 
if you want guaranteed beauty, then you should first decide on the spectrum and general rules shading, especially if the objects are small. for example, the leaves are always purple with a red edge, and not at random. If you like rules, follow them; if you don’t, don’t follow them. and you don’t have to follow what’s written here either)

Coloring mandalas are a wonderful meditative therapy that will help you completely disconnect from the outside world, concentrate on yourself and get rid of stress. Any color you choose for coloring has a certain energy and has its own meaning.
Interpreting colors will help you learn more about your psychological state, understand emotions and feelings, realize and even identify hidden desires and aspirations. Don’t think for a long time about what colors to paint the mandala with, choose them impulsively, don’t be afraid to experiment in order to find peace and harmony.
Light pink color consists of pink, yellow and white. Denotes tenderness, tenderness, naivety, kindness, caring, romance and affection for home.
White color - a symbol of purity, wisdom, Divine presence, dilutes energy, carries a life-giving stream, protects from negative vibrations.
Beige color symbolizes warmth, comfort, peace, regularity and harmony. Helps strengthen family, love and friendship relationships.
Yellow — the energy of knowledge, learning. Yellow is good for home and clothing in limited quantities. If joy is not enough, use all tones of this color for coloring.
Pink color - romance, kindness, love, passion. People who prefer this color want to live life to the fullest, love new experiences and are hardworking. Purple color - means love, affection, truthfulness, sincerity, power, royalty, nobility. A color for daring and purposeful people. Purple has the energy of compassion, affection, unity, forgiveness, understanding. This color belongs to “creators” who devoted their lives to the embodiment of new ideas. Blue calms down nervous system, brain, muscles. The color of Divine power, Divine Spirit. This is the only color that has no contraindications. Blue color - denotes wisdom and faith. A color that provides additional protection and development of spirituality. Blue color protects secrets. Considered a symbol of the birth of the world.
Golden color symbolizes wealth and success, is a symbol good health and wisdom. People who prefer golden tones are usually very optimistic. Orange color - denotes support, stability, reliability, a symbol of real power. For a sense of stability, hang the painted mandala in a visible place. Red color — brightness, dynamism, mobility. Symbolizes love, joy and wealth. Red in large quantities denotes aggression and power. Brown color denotes thoroughness and practicality, adherence to traditions, respect for family. It is preferred by those who value tradition and family and are confident in their feet. Black color - denotes authority and weight; it rewards the owner with its detachment and secrecy. Use it subtly and unobtrusively.
“Anyone can become an artist!” - today this motto is more relevant than ever. Yes, don’t be surprised, nowadays anyone can feel like the inventive Leonardo da Vinci or the expressive Van Gogh. After all, in the past, in order to paint your own canvas, you had to study for years art school or, at a minimum, complete expensive drawing courses. And everyone, regardless of gender and age, can create their own still life, portrait or landscape in just 3-5 days - just like a real master exhibiting in famous galleries.
What is the reason for this phenomenon? In paintings by numbers, which are gaining more and more popularity in the 21st century. After all, they allow anyone who craves it to unleash their creative potential, even without sufficient experience or free time.
We draw according to the “all inclusive” principle

What’s especially nice is that any set for home painting already includes everything you need: numbered jars of paints, one or more brushes, instructions, a check sheet for checking shades, divided into sectors and marked with numbers on cardboard or canvas with a stretcher, varnish mixture and wall fastenings for the finished painting. You can start creating right away! But first, you should choose the desired basis for the picture and get acquainted with life hacks for coloring.
Cardboard vs canvas


Experienced paint-by-numbers believe that it’s worth starting with. After all, this material is very cheap, but at the same time it is able to absorb excess paint applied to it, which is important for beginning artists. But cardboard does not give the paintings the texture and “realness” that canvas gives: slightly rough to the touch, already primed and stretched on a real stretcher (). The canvas, in turn, is available with a monochrome numbered outline or a colored one. The latter type of canvas is suitable even for elderly and visually impaired people, as well as children, because... coloring becomes intuitive. It’s better to start with small formats and clear subjects: animals, fish, birds, landscapes, nature or flowers. But to drawing people, angels, icons or complex architectural structures It’s worth switching over after mastering the basic techniques of number painting.
With or without rules?
Of course, contemporary art has long ceased to have clear do’s and don’ts, and the rules modern art exist solely to violate them. But for this you need to know them at least a little, and therefore, before you start unpacking the treasured box with canvas and paints, it is worth studying online encyclopedias in order to learn or refresh your memory of the concepts of light and shadow, line and shading, perspective and plane, front and background, color separation and contrast...
And if you are still a beginner and do not have experience in creating paintings by numbers, then it is better to strictly follow the instructions that are in each set. And when you master the basic techniques of this type of painting, you can already develop a wealth of your own techniques and tricks. Moreover, there are not so many basic techniques that significantly facilitate drawing.
"Magnificent Four" methods of coloring pictures by numbers
There are 4 principles for painting a canvas. You will remember them without difficulty, because they are unusually logical and functional, they are already suggested to anyone who draws common sense and convenience.
From light to dark
By painting over white, yellow, blue or pink areas at the very beginning, you will avoid accidental marks. After all, it is much easier to erase or cover up a pastel shade with another color than a bright or dark color.

If you color all the large details of the picture at the very beginning, then you will not only avoid the blunders and blots mentioned above, but you will also be able to correctly arrange the nuances and draw small details, put the right strokes and highlights. This way it will be easier to compare the “small things” with the main semantic spots of the picture: you must admit, by painting over the vase and the three largest buds in it, it will be easier for you to place medium-sized flowers and leaves of the bouquet next to each other.

Moving in this direction, you will definitely not smear the design already applied on the edge with your shirt sleeve or elbow. As a rule, it is in the middle of the picture that classical artists place main image, be it a hut in a pastoral landscape or a bowl of fruit in a delicious still life.

This method of moving across the canvas also allows you to avoid rubbing off the paints that have already been applied with your elbows; they will dry as you apply them, and when you reach the bottom edge, the top of the painting will be almost dry.

How to hold a brush and make strokes?

The brush is easier and more comfortable to hold in the same way as you hold ballpoint pen. Your hand should have support. This is enough so that you do not get tired, and the picture turns out neat. To begin with, you should master the usual strokes: just try to paint over each numbered fragment as evenly as possible, making smooth movements with a brush from left to right (if you are right-handed), applying paint in an even layer of thickness, without going beyond the contour.
Once you've mastered this, you can experiment with layer thickness, shading, and even dot painting if your artistic vision calls for it. For example, if you need to draw a heavy rain cloud saturated with water. After all, its lower part is rough and dark, which is well conveyed by small ripples of dots, and threads of rain descend below, which are easiest to imitate with short oblique strokes.
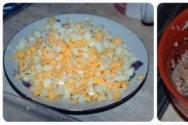
Bright mix: how to mix paints correctly?
As a rule, the paints in a set are already mixed, which is why there are so many numbers in it, because each of them means a certain shade, which sometimes differs only by a fraction of a tone from the previous one. If in the process of drawing you run out desired color, it is quite possible to mix it yourself from existing paints. Usually, light tones run out first, because there are usually more light spots in a picture than dark ones, and therefore you just need to slightly dilute with white the tone that is closest in shade to what you need. It is best to do this on a palette or a sheet of cardboard, and not directly in a jar, so as not to accidentally spoil the entire mass of paint.
Effective and impressive: blurring the boundaries
This is amazing, but with just two techniques - creating clear or blurred boundaries - you can give the picture depth, expressiveness, and professional look. To understand in which area you should make the clearest possible outline, and where you should slightly blur the edges, just carefully examine these places on the sample reproduction.
This is shine: 3 unique types of varnish
When the painting is ready, you will probably want to give it some shine and protect it from dust, cracking and fading by covering it with a transparent protective base.
Matte Acrylic varnish is good because it dries unusually quickly and also gives the paints additional brightness. Literally a couple of 6-8 hours after covering the painting, you will be able to proudly hang it on the wall and invite your family and friends to your own vernissage.
Gloss, as the name implies, gives the image a special shine and smoothness. This is a plus if you want to smooth out some roughness, but a minus if you want to emphasize volume. The aforementioned matte finish does a better job of imparting texture.
Craquelure truly magical: it allows you to nobly age a completely new painting in a matter of moments, covering the surface with a network of intricate cobweb cracks, turning a newly created portrait or landscape into an elegant antique.
Auxiliary materials
Before starting work, you should cover the table with newspaper or film, install bright but not glaring lighting, and also stock up on toothpicks and cotton swabs. The former will help you draw even the thinnest lines, while the latter will be useful for promptly removing excess paint or correcting a bad stroke. You may also need a set of brushes of the best quality and different diameters, a palette and even an easel if you are going to paint outdoors or in the country.
Don't forget to place a sippy cup of water and disposable napkins on the table. But don’t rush to open all the jars of paint right away: acrylic thickens quickly, so open them step by step, number by number.
Frame for a man-made masterpiece: choosing the ideal frame
Acrylic perfectly imitates classic oil paint, and therefore it is worthwhile to arrange the finished picture with dignity. A textured, slightly recessed and gilded or silver-plated frame in the Baroque style: with fine ligature, vignettes or vines will suit almost any subject. After all, then the image will acquire the proper volume and become a worthy decoration for your home art gallery! ()
The algorithm for working with a picture is as follows:
1) Find the correct pigment number corresponding to the number on the picture that you want to paint over
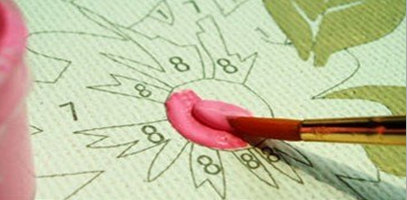 2) Paint over the fragment of the painting corresponding to the paint number. Important: do not dilute paints with water!
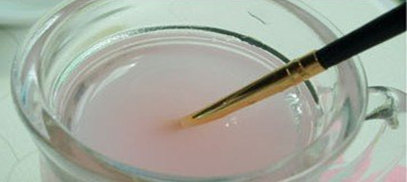 3) Having finished one number, the brush should be washed. Important: do not mix colors!
 4)Using a dry brush, move on to the next number.
 5) Color all the numbers on the canvas and you will see the result of your work.
Warning
1.Paints dry very quickly! Make sure the paint pot's lid is tightly closed when not in use.
2.Don't leave your brushes in the paint! Wash your brush thoroughly immediately after use.
3. Paints have a fixing force, so they cannot be washed off after drying.
4.Do not allow paint to dry completely on your hands, clothes or interior items! Wash it off as quickly as possible.
5.Do not give to children under 3 years old - contains small parts!
COLORING TIPS
So, in front of you is an open set of paint-by-numbers coloring books and you can’t wait to start creating your masterpiece. The tips below will help you draw a picture in such a way that you can be proud of your work, and after finishing painting you will hardly be able to guess that the picture was painted using this method (by numbers).
Of course, in this article it is impossible to tell and describe all the nuances that exist, since painting is a real art. We simply tried to summarize the practical drawing experience we have already accumulated along with the recommendations of various manufacturers and present it in the most accessible form. So:
DRAWING SEQUENCE RULES
Preparing paints
Before you start painting, you need to carefully prepare your paints. The whole trick is that MENGLEI and Truehearted products do not require any mixing of paints to obtain the desired shade and effect: everything is already completely ready and numbered, since the manufacturer took care of this in advance! Our paint sets are perfectly matched to color scheme and presented in the right quantity so that your future masterpiece is guaranteed to be similar to the original, and maybe even better;-) It all depends on you!
Pay attention to the numbering of paints in containers
When painting by numbers, it is extremely important that the numbers on the containers match the numbers on the canvas. Some plots involve the use of several containers with the same color of paint, respectively, these paints have the same number. Therefore, the numbering sequence is as follows:
Opening bottles
Open bottles of paint carefully, without using force - this may damage the bottle. To prevent paint from drying out, always open only those paints that you really need at the moment.
Drawing
For convenience, place the following items near you: an image of the finished painting, paints, a brush, a canvas with an outline, a control sheet, a glass of water, a piece of cloth and matches for stirring the paints. It is better to choose a place with good lighting. Outline large surfaces first with a thin brush, and then paint over the surfaces with a thicker brush. Make sure you fill in the contour lines. It is considered normal if dark paint covers better than light paint. If the outlines or numbers show through, apply paint to them several times.
How to hold a brush
Hold the brush like a pen. For stability, place your hand on the surface and rotate the picture so that its location is convenient for you.
Drawing order
There is no single approach to the order of painting. There are several drawing techniques:
1)You can draw a picture using the “line by line” method, from the top edge of the picture to the bottom.
2)However, you can achieve best result, if you paint using the “background to foreground” method, first painting objects in the background and then in the foreground.
For example, you are drawing a landscape. In this case, the drawing order is as follows: 1. sky, 2. clouds, 3. meadow, 4. trees, 5. leaves, 6. flowers.
1) Sometimes the question may also arise: should I paint a picture by numbers or by colors? Empirically and experimentally (Attention: such conclusions were made by “practitioners” and are not official recommendations of the manufacturer), some users identified two options:
- In the sequence of numbering of paints in the set:
- from increasing the total number of areas and contours that need to be painted with one color to decreasing. Example: with paint No. 1 in the set you need to paint 15 contours, and with paint No. 2 - ten contours.
2) In sequence from lighter shades and colors to more saturated and dark ones. This is due to the fact that if there is an error in coloring, it is much more difficult to paint dark segments with light paint than it is to paint light segments with dark paint. In other words, in order to paint a dark segment with white paint, you need more layers and vice versa: you can paint a light segment with dark paint in one layer, i.e. much easier.
As you can see, there are many variations and interpretations of the paint by number technique. Various combinations and alternations of techniques and methods are also possible, which provides us with an endless number of options. In other words, you are absolutely not limited by anything except your imagination, desires and skills. You shouldn’t get hung up on anything: you need to draw in a way that is convenient, pleasant and comfortable for you. Just start drawing a picture and in the process you will understand which technique and method of drawing is most pleasant and convenient for you.
For a perfect image of the finished painting paint over unpainted areas and visible numbers. As in art galleries, you need to look at the painting and evaluate it from a distance of 2-3 meters.
Notes to skilled artists
The painting effect can be enhanced by applying different thicknesses of paint. To do this, apply the remaining paint in a thick layer to the elements of the picture that you would like to highlight. This will give the picture a relief effect.
Varnishing
Acrylic paints, after drying, acquire a light gloss and beautiful appearance. The surface of the painting can be wiped with a slightly damp cloth. No additional care required. If desired, a week after the painting has dried, you can coat its surface with a special varnish for paintings. Glossy varnish will enhance the brightness of the colors, and matte varnish will remove glare. Varnish can be purchased in special stores for artists and craftsmen.
Frame
By placing the picture in an appropriate beautiful frame, it will become a real masterpiece! To preserve the effect of the painting, you do not need to place it under glass. You can decorate the picture regular frame, buying it in self-service stores, or an exquisite frame, purchasing it in specialty stores or galleries.
RULES FOR USING PAINTS
To paint without problems, you must follow the rules for using paints. This is extremely important!
Therefore, we ask you to carefully read the following rules and follow the drawing instructions.
Important: Once the paint cans are opened, the paint has a limited shelf life!
Rule 1
Open paint cans just before you start painting. It is very difficult to package quick-drying paints in such a small volume (about 3 ml) in such a way that they can be stored for a long time. Cans of paint, which are the development of the latest generation of the company MENGLEI and Truehearted fulfill this requirement. However, once they have been opened, the paint may dry out. Therefore, the amateur artist should complete the painting as soon as possible after opening the paint cans
Rule 2
Using a brush, remove any stuck paint from the lid back into the jar. Boxes in a store or warehouse could be stored vertically. Therefore, when opening the jar, some paint may be on the lid.
Rule 3
Despite the fact that paint containers are tightly closed and are specially designed to preserve all the properties of the paint, the paint in them may thicken slightly during storage, for example, due to temperature changes. To “revive” paints and use them again, simply add a couple of drops of water to them and stir thoroughly. The paints are ready to use again!
Rule 4
Once the paint cans have been opened, try to complete the painting without taking long breaks. After opening the jars for the first time, there is a possibility that the paints may dry out. Therefore, after opening paint cans, try to use them within a maximum of 12 weeks.
Rule 5
If you want to take a break from working, close the containers tightly, first removing traces of liquid or already dried paint from the lid itself, from the edges of the lid and the sealing grooves of the lid.
Figures A and B show the principle
In Figure AThe container is airtight because the edges of the container fit smoothly into the clean sealing grooves in the lid. The lid fits tightly to the edges of the jar.
In Figure B improperly closed jar. It can be seen that the remaining paint does not allow the lid to close tightly. Therefore, air entering the container dries out the paint. Therefore, clean each jar thoroughly before sealing it. Remove any remaining paint from the edge of the container with your fingernail or rag, and the round sealing grooves with a toothpick or large needle. Before closing the jar, make sure its rims and lid are clean.
Rule 6
If you plan to take a break from painting for a few weeks, seal the paint pots tightly as described above, then wrap them in a damp cloth and place them in a plastic bag or plastic box. This will help protect the paints from drying out. However, this cannot guarantee that already opened paints will remain ready for use and retain their properties for many months or years.
Rule 7
After each break in painting, the viscosity of the paints should be slightly adjusted to ensure proper application. After all, paints contain water, which quickly evaporates from open containers. Therefore, the colors thicken a little. But this is easy to fix: add a few drops of water and mix thoroughly.
RULES FOR CARE OF BRUSHES
In order for the brush to serve you for a long time and with high quality, you must follow the recommendations below. Artists sometimes complain about the quality of brushes. However, in most cases this is due to improper brush care.
The most common mistakes:

1. Do not leave the brush in a glass of water.
2. Never clean your brush with aggressive chemicals.
3. Never use a brush to stir paint.
4. Never use your nails to remove dried paint.
Proper care:
|
The brush consists of three parts: a handle, metal fasteners and a fleecy part. 1. After painting, immediately wipe off any remaining paint from the brush. 2. Rinse the brush in clean warm water. 3. Gently lather the brush and then rinse it again. 4. Wipe the water off the brush using a rotating motion. Paint should not remain on the end of the metal fastener. 5. Use your fingers to shape the bristly part of the brush back to its original shape, forming the tip. 6. Put the brush down and let it dry on its own. Do not use a heater or hair dryer! The most important rule is not to be afraid! Color for fun - Everything will work out! Happy coloring and shopping! |